I used Cinema4D 3D software to demonstrate PING’s new adjustable-hosel technology while promoting the premium appearance of PING golf clubs. The technology is difficult to show because most of it is hidden inside the golf club. To demonstrate how the hosel is adjusted, I simply animated the hosel and shaft being removed, adjusted, and then reinserted.
To reveal the secrets inside the golf club, I developed an x-ray effect and cut away a section of the golf club to show how the new adjustable hosel is integrated with the rest of the golf club.
To give the golf club a premium appearance, I created a gradient light source that closely mimics how a photographer would direct a photo light through a light panel. I also made the renderings look more realistic by adding subtle variations to the edges and surfaces of the golf club that were not in the original 3D CAD model I received from the engineer.

A close-up of the adjustable hosel removed from the golf club head.
The adjustable-hosel technology optimizes ball flight through loft changes. Rotating the hosel to the (+) position adds loft, while the (–) position decreases loft. The more loft a golf club has, the higher the trajectory of the ball.

Separate x-ray scenes were rendered to create the x-ray effects.
The x-ray scenes of the video animation required an additional rendering of the scene with an x-ray appearance. To create this appearance, I applied a special texture to the 3D model that makes surfaces more transparent when they are parallel with the camera and surfaces more opaque when they are perpendicular to the camera. This lets you look through objects but still see their edges.

The reflection in the sole of the golf club is made by a custom gradient light source.
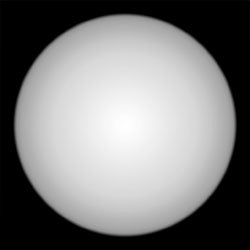
The gradient image that was applied to the light source.
We have all seen bad 3D renderings! The main reason for these poor renderings is the simplistic lights available in 3D software. I bypassed these lights in Cinema4D and created my own custom light source in Photoshop. There, I created a gradient that closely mimics the appearance of a photo light being directed through a light panel. I kept the center a little brighter to mimic how the bulb of the photo light would show through the light panel a little brighter. Then, I brought this image into Cinema4D and made it glow and shine on the golf club.
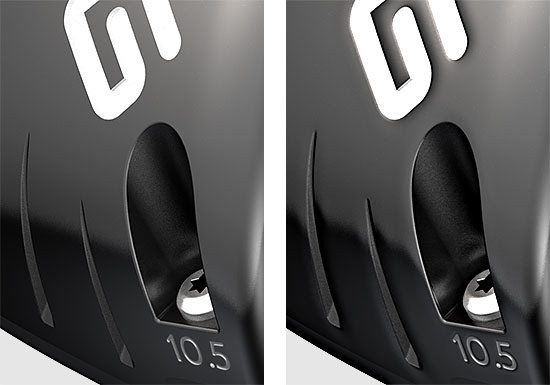
Before (left) and after (right) I added subtle variations to the edges and surfaces of the golf club.

Texture bump map I used to add variations to the edges and surfaces.
Compared with the real golf club, much of the subtle variations in the edges and the surfaces are missing in the 3D CAD model. Unlike the real world, the 3D world is perfect! To create more realism in the renderings of the golf club, I added these variations back into the golf club by applying a texture bump map. Areas in the map that are white cause the edges and surfaces to recede while areas that are gray have no effect.
To demonstrate a new technology in a video animation, you must get the action right. This project began with this simple script from my client:
1. Club begins in a hero shot position and rotates to a heel position for the next scene.
2. Hosel rotation scene: The hosel and shaft back out of the club head, rotate, and reinsert into the (+) position and then the (–) position.
3. Club rotates to a face/heel position. A section of the club is removed to reveal the adjustable hosel in its inserted position. Apply the x-ray appearance and circular graphics created for the print illustration.
4. The removed section of the club reappears and the club spins to a close-up hero shot position. Apply the x-ray appearance and circular graphics created for the print illustration. Back the hosel and shaft out of the club head.
5. The x-ray appearance and circular graphics fade away. The hosel and shaft reinserts into the club head. The club ends in a hero shot position that shows a little more of the face of the club.
Using this script, I blocked out the scenes for the animation in Cinema4D, adjusting the placement of the camera and golf club and the timing of the action, to create a rough animation for my client’s approval. Approval at this stage was important because once the rough animation was approved, I began the lengthy process of rendering hundreds of frames of high resolution, photo-realistic images to create the final video animation.
If I can help you on one of your own projects, phone me at (602) 494-2777 or email me.