Beauty retouching takes me longer than it use to. I tried the shortcuts such as blurring skin to remove blemishes and flaws and using quickly-created masks to separate hair from backgrounds and fabrics. They were quick, but the tradeoff for speed was evident: Skin that looked like a fake rubber mask pulled over the model’s face and hair that blurred and clumped together in a spotty mess. Sure the flaws were gone, but the model looked less real after being retouched. Now, I use beauty retouching techniques that enhance the model’s appearance, but keep skin looking like skin and hair looking like hair. Keeping it real!
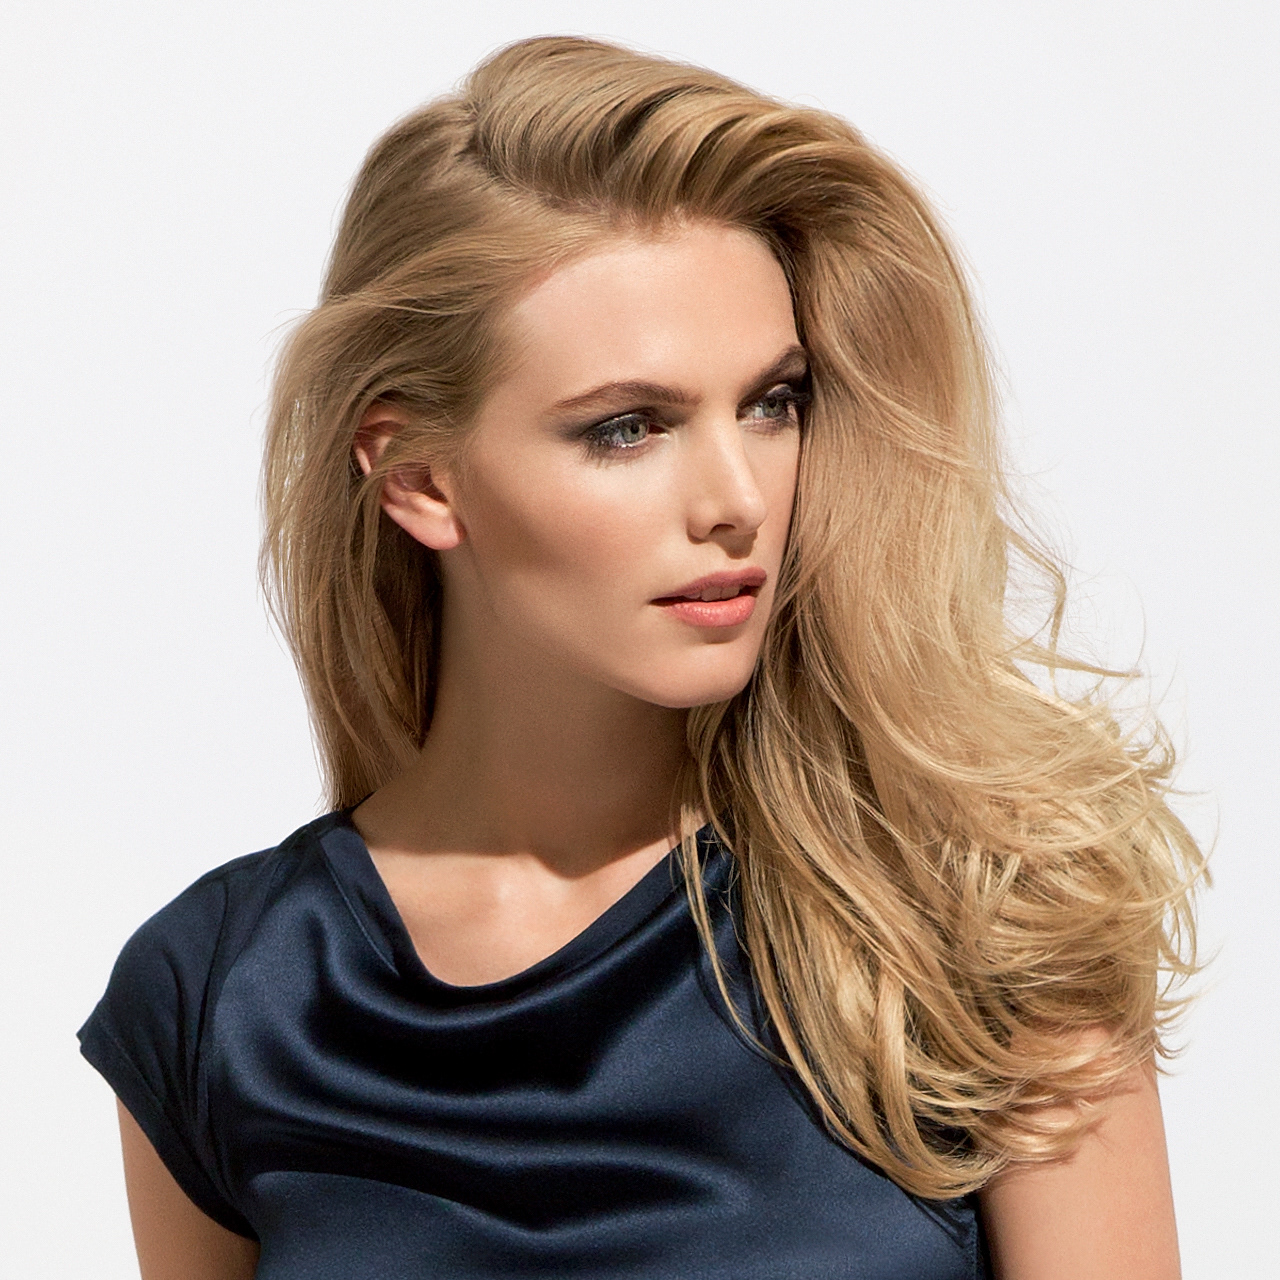
The blurring-the-skin technique, left, leaves the model’s skin looking rubbery and mask-like. The healing brush technique, right, retains the delicate definition of the highlights on the model’s nose and shadow underneath her cheek bone.
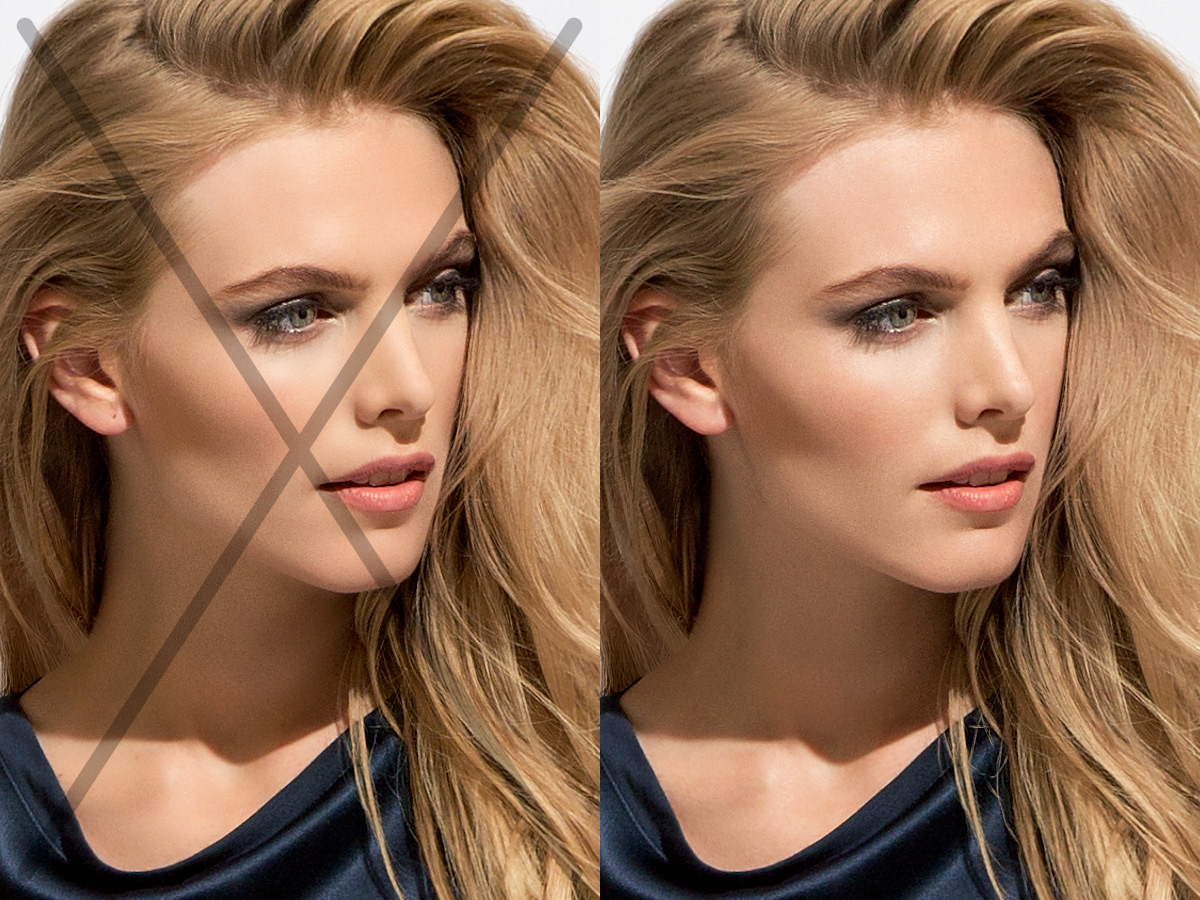
The Photoshop layer of the blurring-the-skin technique, left, and the Photoshop layer of the healing brush technique, right.
When retouching skin, knowing what to keep and knowing what to remove is paramount. Of course, first, it needs to look real. The second goal is to create transitions where one surface of the skin blends pleasingly into another while retaining the natural texture and detail of the skin. The best way to do this is to go carefully over it, inch by inch, removing blemishes and flaws using the healing brush. With this technique, you can pick and choose what detail you want to keep; detail that the indiscriminate blurring-the-skin technique would obliterate, such as the texture of the pores of the skin and the edges of highlights and shadows.

Animated GIF file of the raw before image and the retouched after image. Notice how I reshaped the model’s hair and narrowed her nose using Photoshop’s Liquify filter.
Animated GIF file of another photograph in the series. I used Photoshop’s Liquify filter to smooth out wrinkles in the fabric where it meets the background and soften the curves of her heels and elbow.
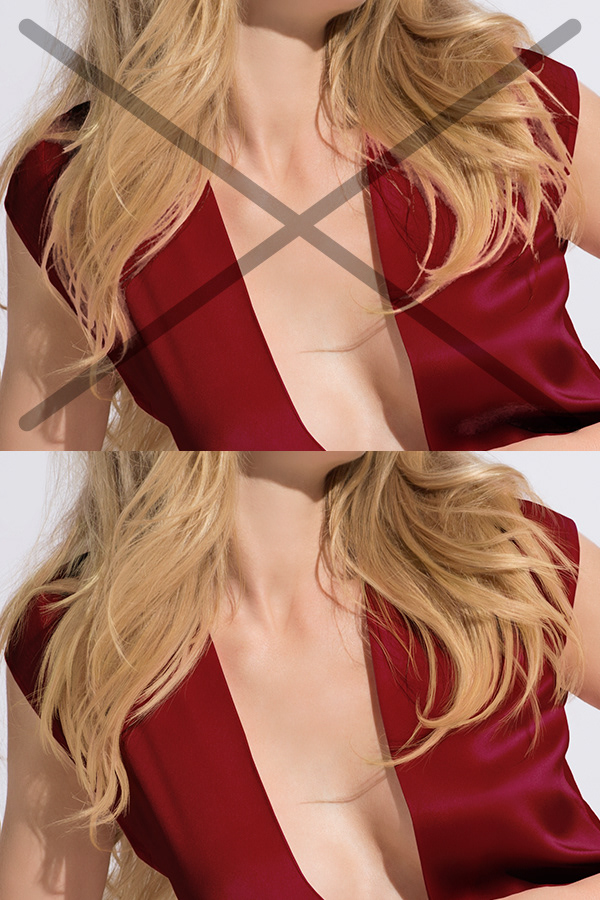
Changing the color of the fabric to red in Photoshop was complicated by the model’s soft hair falling over it. A simple mask, top, lead to a spotty mess, while drawing in hairs with a digital pen and drawing tablet, bottom, created soft, natural-looking hair.

The Photoshop layer where I drew in individual hairs to make the hair look soft and natural as it falls over the new color of the fabric.